Wednesday 18 February 2015

BA2 - Final Renders

Final Renders

And so, here we are. With a finished sculpt. I wish it could be more optimized for games but as described earlier, because of the lack of normal map it wasn't possible to lower the polycount to such low levels and still keep the smoothness of the sculpt. I am however satisfied with the sculpt and for my portfolio piece I am thinking about revising it and recreate the low poly using 'Topogun' and create an fully game optimized asset, complete with normal and specular map. 

Final Render in Marmoset Toolbag 2

Final Render in Zbrush

BA2 - CS Research - Contacting people in the industry

To get primary research for my essay about "Is the gap between the Games and VFX industry shrinking for 3D Artists?" I will be contacting some good friends of mine that I have known for a few years and have now ended up in various places in the industry. 

The first person I will contact is Ryan Schake, an old friend of mine who I used to work together with on a game using CryEngine. Ryan started off as a Games Art student at Full Sail and at the same time worked on various MOD and Game projects using CryEngine. He later started to work for 20th Century Fox on the new movie "Fantastic Four" as an Landscape Artist.

The specific questions I sent to Ryan was:

  • What would you say are the biggest differences between working in the Visual Effects Industry rather than the Games Industry?
  • What would you say are the biggest similarities between the two industries?
  • Did you feel that the skills you developed for the games industry helped you when working for the VFX industry?
  • Over the years, have you felt that the technological gap between games and VFX industry has become smaller?
  • What's your thought about the future of the VFX/Games Industry?
  • Would you see yourself working for the Games Industry or VFX Industry in the future?
  • What kind of software did you use while you were working at 20 Century Fox?

As for my second person I contacted my friend Nate Broach who are now working as an Environment Artist at Firaxis Games. Creators of games such as XCOM and Civilization.

To Nate I send the following questions:


  • Over the years, have you felt that the gap between the games and VFX industry has become smaller? (When it comes to tech, Software etc)
  • What's your thought about the future of both the Games Industry and Movie Industry?
  • What kind of software/tech have you been using over the years?
  • Do you think the technological advancements in the game industry have been to rapid? (Considering glitchy games at launch starts becoming an issue)
  • How often do you have to learn new techniques/software?
  • How do you think the technological advancements will effect the indie scene?


The third person I will contact is also an old friend of mine I got in contact with during my modding days, His name is Joe Garth and at the time he worked at Crytek as an level\effects designer at Crytek in Frankfurt, Germany. He have now works as an Cinematic Director at Crytek.

To Joe i sent these questions:


  • Over the years, have you felt that the gap between the games and VFX industry has become smaller? (When it comes to tech, Software etc)
  • What's your thought about the future of VFX/Games Industry?
  • What kind of software/tech have you been using when working at Crytek?
  • As a cinematic director, do you see yourself changing to work in the VFX industry in the future or will you be continuing to work in the Game Industry?
  • Do you think the technological advancements in the game industry have been to rapid? (Considering glitchy games at launch starts becoming an issue)
  • How often do you have to learn new techniques/software?


Since I promised in my mail not to show their answers online, I cannot upload any of the answers I received here on my blog I am afraid. I will include the e-mails at the end of my essay as Appendices.

Tuesday 17 February 2015

BA2 - Texturing in Substance Painter

Texturing in Substance Painter

Since I already have experience of texturing I decided to texture my model using a UVW map. Instead of texturing it traditionaly by using Photoshop I have lately taken a keen interest in Physically Based Rendering and the software Substance Painter, so I decided to research PBR and try it out on this sculpt. My research of PBR can be found on my blog. Of course, since Zbrush doesn’t support any other maps than a Diffuse map, the use of PBR wasn’t possible but I still decided to texture my sculpt with Substance Painter to learn the software for future use.

My low poly model, since we were not allowed to use Normal maps had to end up at a polycount around 200k polygons. This would definitly not be acceptable in a video game but if I wanted it to still look smooth without normals this was about the lowest i could go. If we would render it using Normal map’s I would create my own topology using a software called Topogun, where it would end up way less polygons.

Before importing my mesh into Substance Painter i baked an Ambient Occlusion map by using 3dsMax. I used the AO map as a replacement for the Normal Map. It won’t effect the lighting but it still will create the illusion of detail by capturing the light information (Such as highlights and shadows) from the high detailed sculpt.

My mesh imported into Substance Painter with nothing except the AO Map applied.


 Final texture map. Diffuse map and AO map combined. The final texture is 2048x2048.


Monday 16 February 2015

BA2 - Creating the Scales

Creating the Scales

Since I have earlier experience with creating tileable textures I decided to create my own tilable scale alpha. The reason why I decided to do it in 3dsMax instead of Maya is because when creating tilable textures the co-ordinations are very important, and I find 3dsMax coordination system more comfortable to use. Also I find the baking results better. 

I started off by creating a single scale, I did this by first creating a plane and from there get the main shapes out and then use the shell tool to give it thickness. After this I created a plane in the size 512x512, this plane will eventually become the texture and will work as the frame for my texture.


To create a tileable texture I start off by placing the scales in each corner, this is to make sure the edges are tileable. I use the grids and the coordination system to make it tileable.


I figured out that if I used the array tool and moved the scales by 20cm I got a tileable result because it matched up perfectly with the other scale I had placed in the other corner.


Used the same technique but moved them all in the Y axis and I now have a perfectly tileable texture, ready to bake.


Here is a profile shot of the scales, since the alpha uses height information to create geometry I had to think about the height. If I would just create flat scales they would also end up flat in Zbrush.


Since the scales now were in place I used the 512x512 as projection, I placed the scales above the plane and changed the cage of the planes bake to be above the scales. This way I now get the height information from the scales baked into the plane.


Here is the result of the baking process. Note, this is not the Height map but the diffuse map combined with AO.


Here is the result of the tileable Height map (Alpha).


BA2 - Creating the finger nails

Creating the finger nails

Since fingernails are hardsurface I decided to create them in Maya intead of Zbrush.

I started off by creating a tube, split it in half and from there create a shape that resembles a long and sharp fingernail.


To get the right bend I selected the vertices in the corner and turned on Soft selection, and then I rotated it.


When I had achieved the bend I wanted I selected all verticies and rotated it to make the beginning of the nail flat.


Once it was flat I now had the correct shape I needed, from here I imported it to Zbrush and by the help of move and rotate tool get them into place.


BA2 - Creating the tissue and fins.

 Creating the tissue and fins

To create the Tissue I started off by appending a Zsphere as a subtool. I then created a sort of ”Frame” around where I wanted the tissue to be located.


 (Click to Enlarge)

After the frame is made, in the toolpanel go to ”Topology, Edit Topology” and then create the polygons using the frame. I made sure that I always made either quads or tris. After that I adjusted the skin thickness to fit what I wanted and then I created an adaptive skin. This is how I created all the tissue on my Mermaid.

 (Click to Enlarge)


Saturday 14 February 2015

BA2 - CS Research - Presentation by Walt Disney Animation


Today I went for a trip to London for a presentation by Walt Disney Animation Studios about the creation of their newly released movie "Big Hero 6".

The presentation consisted of Zach Parris, Head of Animatiod. Camille Eden, Manager of Recruitment and Kelsi Taglang, Supervisor, Talent Development & Outreach.

I decided to go to this presentation because I saw it as an opportunity to learn more of the Animation industry and also it fit perfectly with what I have chosen to write about in my CS Essay. My essay will be about "Is the gap between the Games and VFX industry shrinking for 3D Artists?" I managed to ask Camille Eden in person what her view of the matter was and if as a Games Art student what they expect to see from a portfolio. I couldn't ask more questions unfortunately because there was a lot of people interested in asking her questions but I was satisfied with the answer and I will definitely use it in my essay. The presentation itself was great and I had an amazing time. I will definitely go to
more presentations if I get the chance and it did peak my interest in the animation industry.

Friday 6 February 2015

BA2 - Final Sculpt Progress

Final Sculpt Progress

With the right pose figured out, i turned it into a Polymesh 3D and started to sculpt my final gargoyle. I will now show my progress on how i reached the end result and also any problems that accured on the way.

First off is the result when I turned my Zspheres into Make into Polymesh 3D. I after that started off by adding basic shapes and try to get the silhouette right with as few polygons as possible.


I gradually added more polygons, refined shape. After that I got the features in place. (Nose, Mouth, Eyesockets, Ribcage, etc.)


 I continued to polish the facial features, I also added more detail in general.


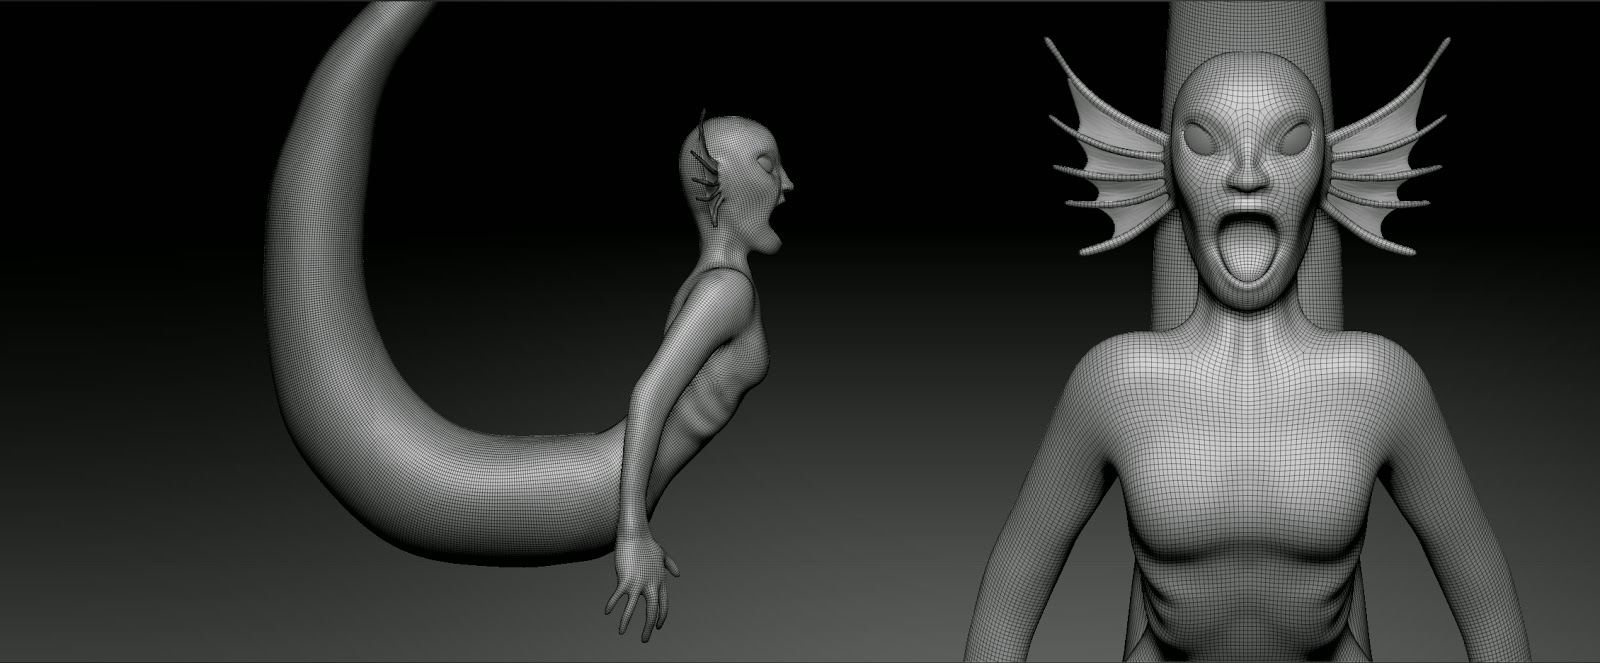
After that I created tissue for her tail and ”ears”. I created another blog post about how I created this. It can be found here.


At this stage I felt rather satisfied with my shapes so I decided to Zremesh it to correct the topology.
And after that continue working on it by using subdevision.

Before Zremesh, current Polycount: 944 654

After Zremesh, new polycount: 96 429

Now, by working with subdivisions I added more refinement to the face. I also added more detailed facial features such as teeth and a tongue.


I thought that the tail on my mermaid was too big and grabbed too much attention away from the main figure itself, so I decided to recreate it.

Old tail fin

New tail fin

I started to refine the hands a bit more, added tissue between her fingers and also created finger nails in Maya and imported them into Zbrush. I created a separate blogpost about how I created the finger nails Here.


I got some feedback on the fingernails on that they were too long and not sharp enough so I decided to remake them. Here is a comparison shot.


After receiving some critique I adjusted some parts of her face, moved the jaw back a little bit etc. I also decided to remake her nose and eyes because she didn't feel monstrous enough.

Old

New


When I revamped the nose and added more detail to the face the topology got a bit off, so I decided to Zremesh the face for a 2nd time. I froze the subdevision levels and masked off the area I wanted to Zremesh. The result was a much better and correct flowing topology.

Old Topology

New Topology

After this I continued to polish, added the platform and also a placeholder wall to see how it would look in place. Added hair and adjusted her according to feedback I got both from critique sessions and also the tutors and friends.


Since I have earlier experience with creating tilable textures I decided to create my own tilable scale alpha. I made a blog post about it here.

After adding the scales I kept polishing it and also added the water tube. I later decided to remove the wall because it blocked the view from behind. I now felt satisfied with my high poly sculpt and moved on to create a lowpoly and UVW Wrapped it using UV master. The texturing process I will show in another blog post.