BA3b - Week 10 Summary
Rethink parts of the project
Since we only have a few weeks left of this project I have been thinking about what I really want to achieve with my environment. I have decided to not create an entrance/ending for the cove and just focus on the parts I already have. The reason for this is because instead of just expanding the cave I now can spend the next two weeks on pure level design and focus on increasing the quality of the areas I already have rather than just expanding the cave further. Because of this I will be merging week 11 and 12 to a single larger blogpost which will purely be level building. I have also decided to make my showcase for the graduate show a video of the environment rather than a playable area. This is because of several reasons. First of all it lets me focus a lot more of my time on increasing the quality of the environment rather than making it playable. It also allows me to control more easily what the viewer will see and can spend extra time making these areas look as good as they can. And since I don't have a lot of time to spend on optimisation for my cave I don't have to worry about it running poorly on the University computers.
Asset Creation
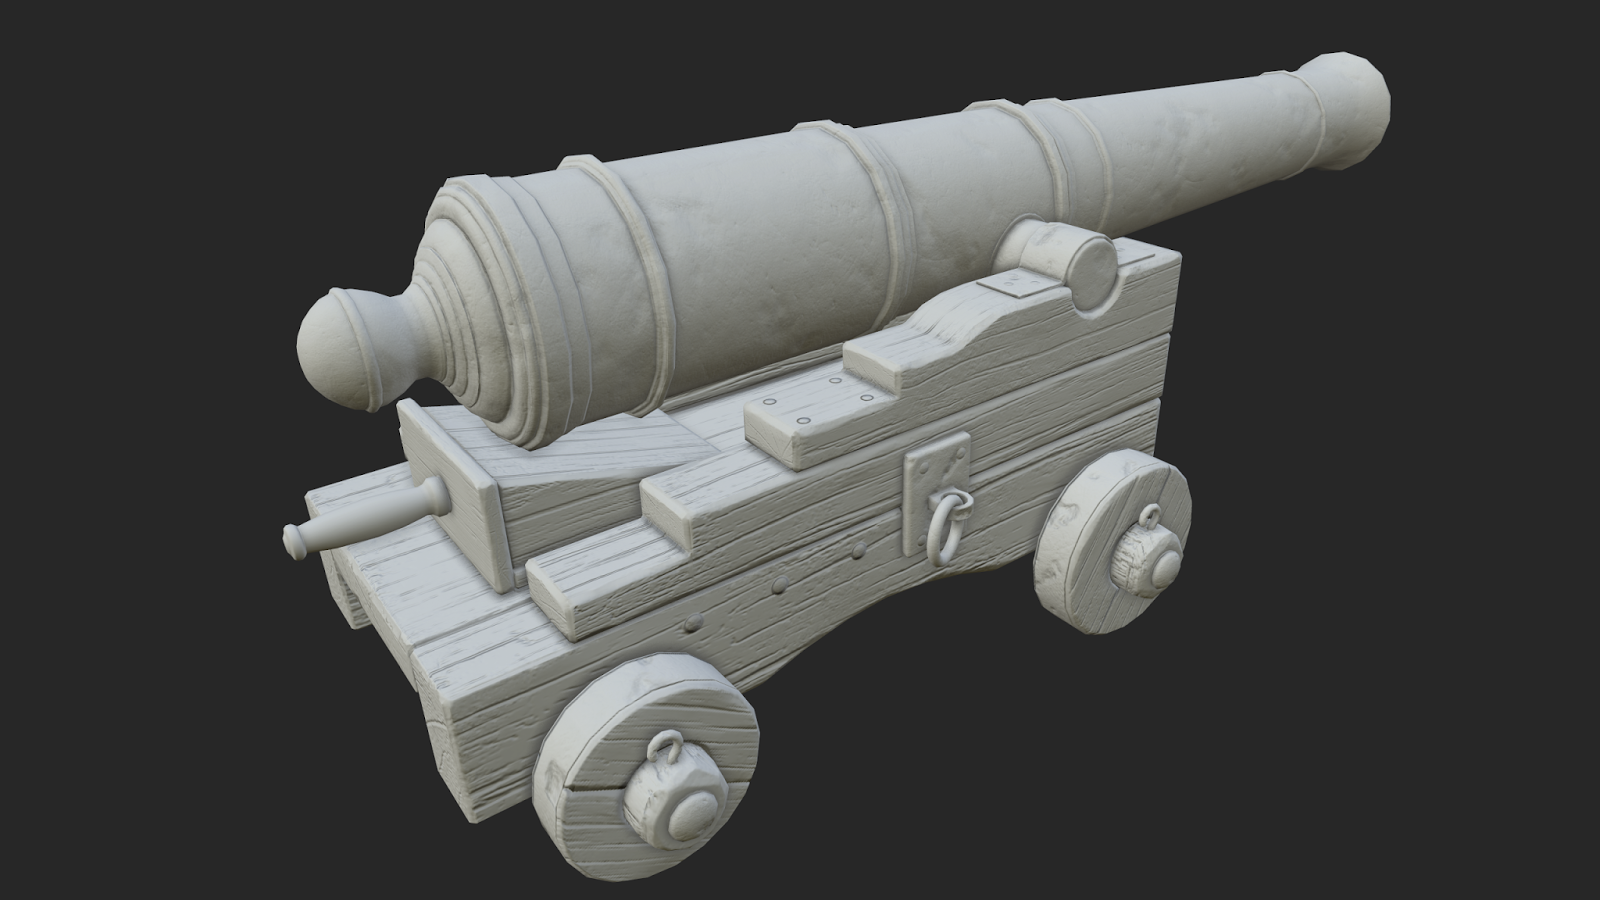
This week I spent doing assets that I felt was a must have for the environment, since the next couple of weeks I will be spending on level building rather than creating more assets. I started off by creating a cannon.
My process for this asset was to create a high poly/blockout. The reason why I say parts blockout is because a lot of the parts on the cannon are made out of wood so these parts I will sculpt in Zbrush, the cannon itself however I will model in Maya.


I then brought it into Zbrush to sculpt. Since some of the parts will be symmetrical I did not sculpt all of the wooden parts because it would require too much UVW space and also it saves me time to make parts symmetrical that you wont notice.


I then created the Low poly in Maya and after that I used Substance Painter to both bake and texture the cannon.
Bake Results in Marmoset Toolbag 2

Texturing in Substance Painter

Final Result in Marmoset Toolbag 2


And here are some final images of the cannon in the environment, the placement of course are not final and just placed randomly to take these screenshots.


With the canon done I then created a shovel and a pick axe just to have a few more assets to spread out the cave and having these tools scattered around the place makes sense. These were easy assets to make and here is a few photos showing the process.


Here is a render of the props in Marmoset Toolbag 2. I decided to make a quick spyglass as well. It wont be used frequently around the scene but still another asset just to break up the repetition a little bit. The cannon balls share the same material as the cannon just to speed up the process a little bit


In addition to a merged cannon version I also imported a split version so I could spread various canon parts around the cave (As seen below).

No comments:
Post a Comment