To start off with I have amazing news this week! I got the job at Rare! I will now be joining Rare LTD as a Environment Artist Intern starting from July! I am SUPER excited about this and it's an amazing feeling to finally enter the industry that I have been chasing towards since I was 13 years old!
Sea of Thieves, developed by Rare LTD
On the pirate cove the progress I made this week was to replace the awful placeholder rope bridge that has been there way to long and also more level building.
Placeholder rope bridge
To create the new rope bridge I used previously created assets. I imported the planks from the construction kit created in the last blogpost and used the rope texture I created a while back.
I now used soft select to bend the bridge and add the "Gravity" to it. I then added hand bars and also added a bit of variation to the planks to make the bridge a bit more interesting.
And here are some screenshots of it in the environment.
While watching the show 'Black Sails' I saw an asset which I thought would really fit into my pirate cove and that was a Lantern. I needed more light sources so figured i'd create it. A quick google search got me to the actual creator of many props for the show and I found the lantern!
Lantern prop used for the TV Show 'Black Sails'
This was a very simple and straight forward prop to make. As usual I first created the High Poly to later bake onto a LP and then textured it here are some images of the process.
Finished lantern rendered in Marmoset Toolbag 2
Lantern in my environment
With the lantern done I then decided to create one of the most classic pirate assets there are. Rum bottles. I found an image online that had a lot of various interesting shapes so decided to just use them as a reference.
Reference Image
Finished bottles in Marmoset Toolbag 2
I tried to create a version with a label on as well but it felt really fake and when watching pirate films/shows there are never any labels on their rum bottles so it made more sense to just leave it without one. I also created a green and a brown version of the texture to add some variation to it.
This week I continued to work on a few more assets for the Pirate Cove and also do a bit of level building. To start off with I figured it was time to create a rope texture since it will be useful for all the random pieces of rope scattered around the scene as well as the structures that will be in the environment. I created the texture using Substance Designer.
Result in Marmoset Toolbag 2
When creating the material in the engine I applied an effect called POM 'Parallax Occlusion Mapping' to it. This is an effect that uses the height map to give the illusion of depth. This is a WAY cheaper technique than using tessellation since its not adding anything to the geometry, although this is still a rather expensive technique to use so if i notice that it make the environment run slower I will remove this effect. But for now this makes the rope look a lot better so I will keep it for now.
Material in Unreal Engine
Rope in environment with 'Parallax Occlusion Mapping' applied.
With the rope texture done I now decided to start working on a few construction set assets. These i will be using to build most of the structures in the scene. Mostly this will just be a set of planks which I then can scale/rotate etc to build with. My approach to these were the same as last weeks crates and boxes.
Zbrush Sculpt
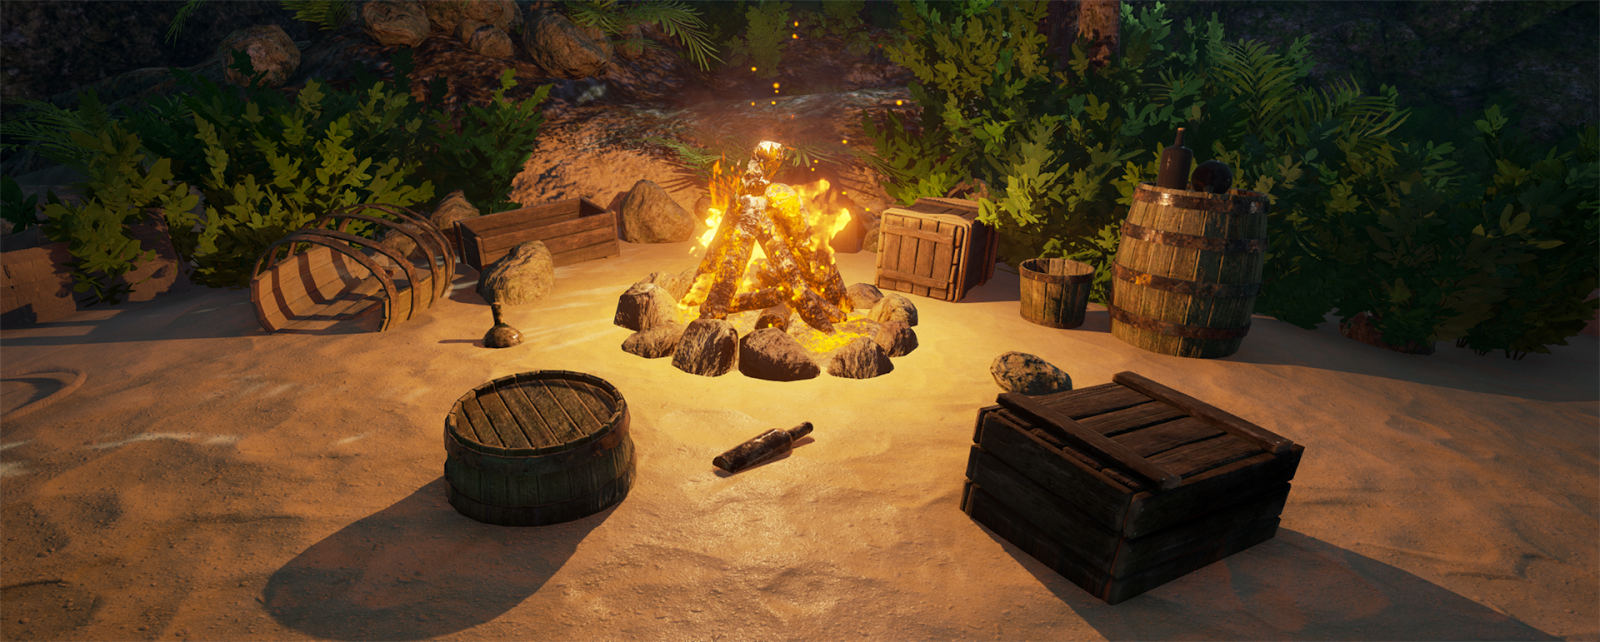
I then textured them using Substance Painter. When these were done I started to build more on the environment. There isn't a lot that I can write about it rather than I was looking at various concept art pieces for inspiration but other than that it was mostly just placing objects and further improve the cave. Here are screenshots of where it's at now.
This week I unfortunately was not able to progress as much as i'd like to with the cove since I had my on location interview at Rare LTD. However, I did manage to create some new filler assets for the scene to fill out the environment with, more specifically crates and boxes!
To start with I created the shapes of various crates/boxes in Maya. I only created 4 but when these are done I will be able to make modifications to them (Such as texture swaps etc.) and by doing so increase the variation in the scene.
With these done I imported them to Zbrush and started sculpting. By using alpha masks I can achieve pretty realistic looking wood. The reason why I took the time to sculpt the wood rather than just applying a texture is because I use the information from the normal map to add sand/moss etc into the creases etc. The end result when texturing just overall turns out a lot better.
With the high poly done I then created low poly by using decimation tool in Zbrush and cleaned it up/removed unnecessary planes in Maya. I then baked and textures the various crates in Substance Painter 2.
And here is the end result rendered in Marmoset Toolbag 2. As you might see I have added the East Indian Trading company logo to some of the crates, this is to enhance the story that this is boxes full of loot that the pirates have plundered from various ships.
With all these assets done I then scattered them around the environment and it really made a big change and made the scene a lot more interesting! I also updated my portfolio with these new screenshots.
Professional Practice
As mentioned above, this week I had my on location interview at Rare LTD's HQ and it was amazing to see their studio in person! Since I am not sure how much I can write about this I will keep it brief but the Interview went very well and it was an amazing experience overall! Now all I can do is wait to hear back if I get the position or not!
This week I decided to focus on my on location interview at Rare. The game Rare is currently working on is a open world cooperative pirate experience that goes by the name 'Sea of Thieves' and it has a very stylised graphic style. Since my portfolio just includes very realistic assets, during the phone interview Rare mostly just took my word for that I do enjoy creating stylised assets. Because of this, Charlotte came up with the great idea to create my own art test in the style of 'Sea of Thieves' to prove that I can do stylised assets to hopefully increase my chances of getting hired. It also shows a great deal of enthusiasm to spend time to create an art test without being asked to create one.
To start off with I tried to narrow down the workflow Rare uses for their asset creation by just looking at footage and various screenshots of Sea of Thieves. Luckily, on their website they have a fan pack that you can download which includes renders from various props in the game. These were super handy to study their workflow.
Various assets used in Sea of Thieves from their Fan Pack
Now I will be explaining what I believe was their approach to create above assets. Please note that this is the workflow I THINK they have been using to create their assets for Sea of Thieves. They might be using a very different approach, however this is the one I will be using while creating my asset for the Art Test and try to achieve a similar style.
Blockout: The first step is to create a blockout in a 3D package of choice to get the general shapes of the asset. The goal here is to create a asset with not too much detail that you then can bring into a sculpting package and sculpt. I will be using Autodesk Maya for this process.
Sculpt/High Poly: The next step is to bring the asset into a sculpting package and make a high poly version of the asset. In here you will add the 'Wonkyness' the assets of Sea of Thieves have and use brushes such as Trim Dynamic to create the stylised edges. I believe most if not all of the 'Stylization/Wonkyness' of the asset is added in Zbrush since it's a lot easier and quicker than doing it by hand in a 3D package such as Maya or 3DS Max.
Low Poly: With the high poly sculpt done up next is to create the low poly of the asset. I believe depending on what asset it is you would either use a 3D package such as Maya/3ds Max to create a low poly OR as I prefer to do use software specifically made to create low poly assets out of high poly meshes, such as "Topogun". Another quick way is to use the decimation tool in Zbrush. This is not the best way to get clean topology, however it does the job and is by FAR the quickest approach.
UVW and Baking: With the High poly and the Low poly assets created up next is UVW wrapping. Using a 3D Package such as Maya/3DS Max is probably the best approach here. With the UVW's done, up next is the Baking process. There are many tools developed for baking now. I will probably be using Substance Painter's baking for my asset since it's very quick compared to other baking software and the results are great.
Texturing: As for the texturing I believe it's a mix of using Polypaint in Zbrush or 3D Coat and painting using Photoshop. The texture style is very unique for Sea of Thieves and I believe they are using a mix of standard Photoshop brushes and various Square brushes. They have mentioned in technical videos that they are using PBR workflow which is very interesting approach to a stylised art style and I believe is one of the reasons why it looks rather unique.
Creating the Asset
To start off with I tried to find concept art of an asset that had a similar style to sea of thieves. The reason why I choose not to create an asset based on concept art from the game itself is because it's probably already been made and would be directly compared to the asset created in the game. Also the developers have seen this asset already countless of times which would make it less impressive when I show it to them for the first time. The concept I choose to use was a concept made by Sam Nielson who is an Concept Artist who have worked on titles such as Disney Infinity.
Concept created by Sam Nielson for Disney Infinity
I will not be following this concept to a 100% since I feel like the mini canon in front etc feels a bit too unrealistic to fit in Sea of Thieves. However, I do really like the general shape of this boat and will be using that for my boat.
Blockout
The blockout was a very straight forward and easy process. Its mostly just to get out the general shapes and think about how I will be using Zbrush for sculpting later on. At this stage I don't care about polycount or anything like that but just purely on shape and form. Topology isn't either super important, however. I do like to have a clean topology when starting to sculpt something because it lowers the chance of the mesh to mess up when raising my divisions in Zbrush so I do still try to keep it clean.
Here was my first try of a blockout for this asset. It's turning out really well but there were definitely parts of it I wasn't very keen on. Such as the back fin, as it reminds me too much of Asian architecture which makes it feel more like a boat suited in Asia rather than the Caribbean. Also I didn't like how clean the doors for the storage space turned out. I felt like i could add something to make it more interesting such as rope etc. Also I didn't like how the railing on the top of the ship was just all one large piece of wood.
I then re-worked the blockout a bit in Maya and fixed the things I wasn't too keen on and this was the new result.
I was definitely more satisfied with the result and it was now time to bring it into Zbrush for sculpting.
Sculpt/High Poly
When sculpting this in Zbrush my most used brush is TrimDynamic with a Square alpha to give the edges a bit more chipped wood feeling. The process was pretty straight forward so not much to write about it.
High Poly sculpted in Zbrush
Low Poly
Since I only had a week to create this and by the time I had to create the low poly I only had a few days left until the interview, I decided to use Decimation Tool in Zbrush to make the low poly. If I had more time I would have used Topogun 2 to create a way more optimised low poly, however. By using the decimation tool I could create a low poly in the matter of minutes instead of hours.
UVW and Baking
The UVW process was okay, since decimation tool creates a very messy topology it does make the UVW mapping a bit more complicated than having a clean topology, but I managed to get a pretty good UVW layout for the time I had. As for the baking I used Substance Painter since its a very quick baking tool and most of the time gave really good results!
UVW Layout created in Maya
Normal Map
AO map
Texturing
Now it was finally time for the texturing. For this process I used Photoshop, I tried to use 3D Coat but since I had very little time for this stage left I decided to just go with a software I was more knowledgeable in so ended up using mostly Photoshop. I mostly used square shaped brushes since by studying the assets in Sea of Thieves it did seem like they used a lot of square brushes to get the interesting detail in the texture.
Considering I only had a few days to create this asset I am very pleased with the outcome! I wish I could add a bit more wonkyness to the asset to make it fit even more into Sea of Thieves art style but it was still a great asset to make and I learnt a ton. Of course if time allowed it I would spend a lot more time on making the low poly using Topogun 2. However, I am very excited to show this asset during my Interview at Rare and hopefully they like it! Here are the final renders I will be showing: