BA2B Collaborative Game Project
Week 6
Final Week
This week was the final week so my job was mostly to just finish of the game. The things I had left to do at the beginning of the week was the following:
- Continue work on the Environment (Village and Ending)
- Add the gameplay using the blueprints I created the first week,
- Add the Audio into the game.
- Replace the Hands.
- Adding the UI.
- Further polish
Replacing the Hands
The first thing I got done this week was replacing the players hands. This was the largest immersion breaker of the game that we still had to get rid off, because we couldn't really keep the robot ones! Since it's the last week I decided to use a base mesh when creating the hands. I edited the hand in Zbrush to fit more with the style we wanted. We decided in the team that we wanted our hands to look like the ones in Firewatch, which are very stubby and has square fingers. Here is the result.


Creating the low poly was an easy process since the base mesh already had very good topology, I just had to lower it to the lowest sub division and it turned out great. For the UVW's I used the Zbrush UVW mapper plugin which works well for organic pieces like this one. To get the hands ingame I used the same technique as I did for my game prototype back in BA2a so it was a rather smooth process. I did however had some issues with getting the skinning right in Maya, but with some great tips from Steven and George we resolved those issues.
Hands in-game untextured.


I do wish that the thumb would be a bit better positioned but because we had so much left to do I had to leave it as is. Natalia created a texture for the hands and they turned out like this;
Arm Texture created by Natalia Rojek

The hands now looked a lot better but it did have an annoying mesh error at the side, as well as feeling a bit bare so we gave Charlotte the task to add to Natalia's skin texture.
The new arm texture created by Charlotte

The Beginning and the End.
The team had now modelled and textured the stage assets so it was time for me to create the beginning and the end of the level. To begin with I quickly created a simple room in Maya.
Room in Maya

The beginning of the level


The end of the level


Voice Recording
Since we want a few voices in our game, we decided to have a voice recording session. Luckily Charlotte has a really good microphone so we could do the recording here without any issues of bad quality. We gave Billy the role as the Director and Jack as the actor. As the Director, Billy would say lines that would play in different situations in the game. For example, when you get hit by an arrow he will say "Keep rolling" e.t.c, to enhance the feeling of you being an actor in a movie. Since he was the director we came up with the idea that it would be cool if his voice sounded as if he spoke through a megaphone, so in Sony Vegas I edited his voice and the result came out pretty good.
We also got the clipper ready and textured so I created a short intro to the game where the clipper would be animated infront of the player as the director says "Aaand Action!".
With Jack's voice I didn't need to do any changes since his lines was mostly just grunts such as "Ouch!" when you as the player got hit by an arrow.
Main Menu and UI
Charlotte finished the UI design so I just had to implement it into the game. I was going to research how to do a proper main menu that loaded on a separate level (so we could have a loading screen), but due to lack of time I had to resort to my old solution from BA2a where the menu is basically just an overlay on the game itself with the game paused in the background. The UI did feel a bit flat in the beginning but as soon as we got the blinking text and the music in there it came out much better. Here is a video showing it in action.
As for the stamina bar it was just a matter of replacing graphics, same with the health.
Environment Polish
While placing the goblins on various places throughout the level I also polished the environments as I went along. Here are some screenshots of the final environment.


Player Speed, Ambiance and Footsteps
For the Ambiance and Footsteps I had to get a bit creative with the Blueprints. Since we have a specific player path, I could easily control these sounds by the player walking through collision boxes.
With the first blueprint I specify what kind of surface the player will be walking on. Depending on what I choose, it plays a different footstep sound that I created by downloading various sounds online and editing them in Sony Vegas. I can also adjust the sound speed of the footsteps so if the player is running, the footsteps will be quicker.
With the second blueprint, I can decide the player speed and also how much I want the camera to headbob. This is to further increase the immersion of the players experience in the game.

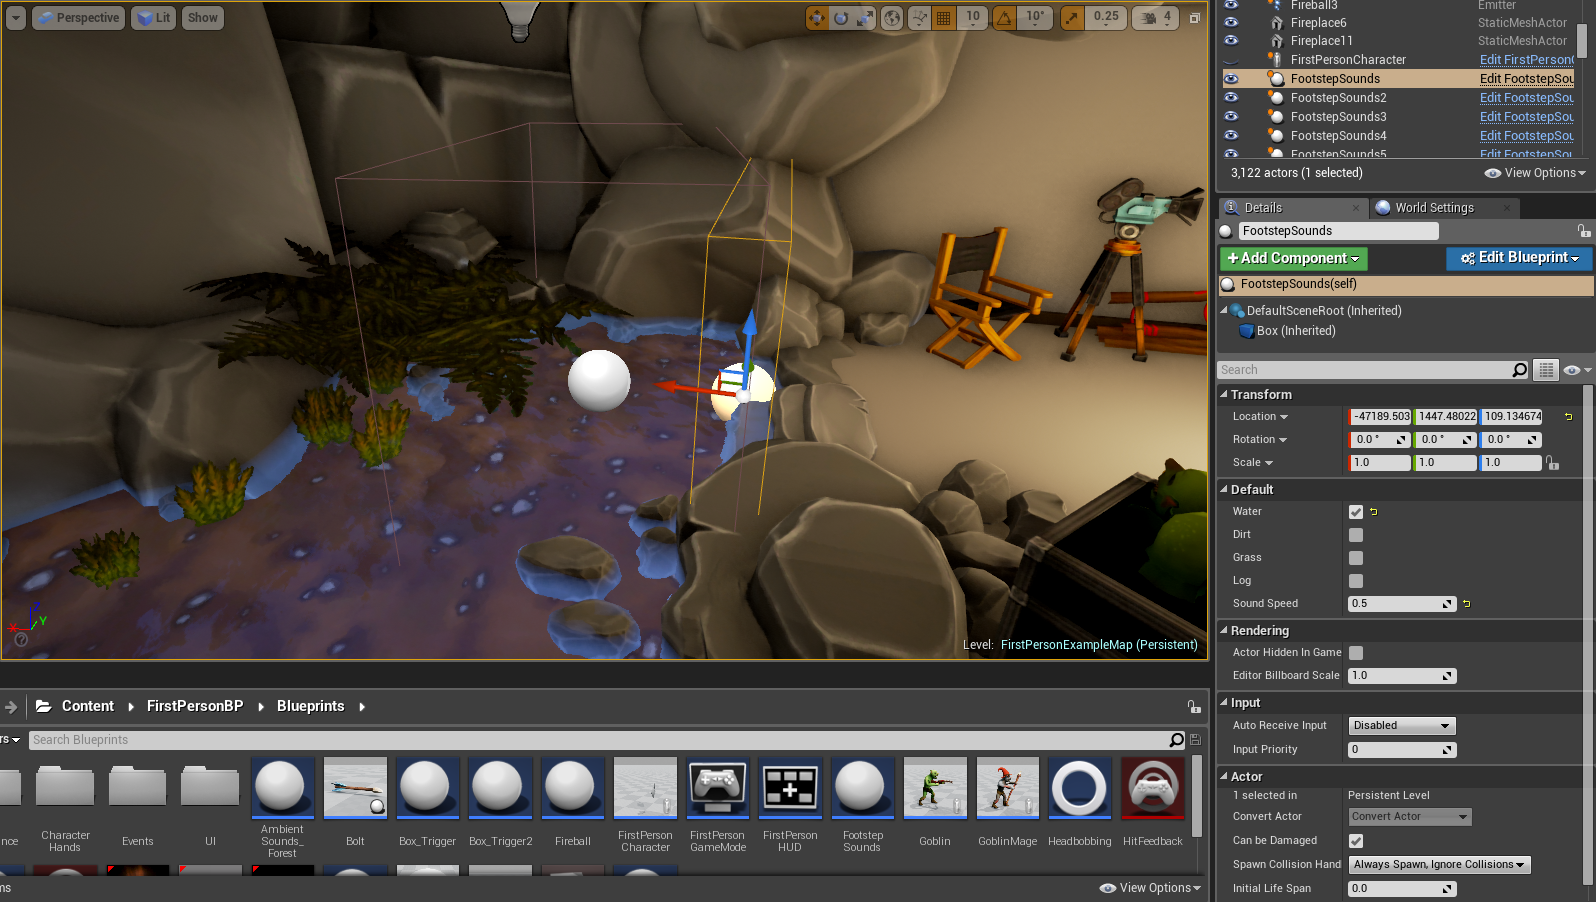
With this third blueprint, I can decide what ambiance will be playing. I can mix and match if I want as you can see on the picture below. Since the player will be entering a cave with a stream inside, I have checked both the Stream and Cave ambiance to be activated.

Gameplay and Events
As for the Gameplay it's pretty much the same as it was in week 2, but now with replaced models. It was just a matter of placing out goblins, a target point for them to aim at and a collision box to tell that specific goblin when to shoot to hit the player.

To make the environment a bit more interesting I added special events at two locations. If we had more time I would further polish these events and also add many more but this would have to do for now.
The first event is that a firemage will shoot a fireball on the mountain which will cause rocks to fall down, fortunately for the player they miss him. Here is a video showing this event:
For the second event another firemage will destroy the bridge which will cause you to have to jump over the broken bit. This would be further polished with voice acting etc but we ran out of time.
Summary of Week 6
The game is now finished and this was a great project. I was very lucky to be with such a great group where all of us were very motivated and hard working. This game would be impossible if we did not have the team spirit that we had throughout the project. As always with games you wish that you would have an extra week or two to polish the game further but I am still super happy with the end result. This week was tough but we made it in the end. I learnt a lot throughout this project about Unreal Engine and also about working with a larger project with people. It was interesting to be at the end of the process and wait for others to create 3D or 2D instead of myself creating the 3D assets but the team worked so hard so it wasn't any trouble.
Overall this project have been a great experience and I am super proud of what we achieved in such a short amount of time.
Overall this project have been a great experience and I am super proud of what we achieved in such a short amount of time.
Here is a full playtrough of the game:


